


Description
This experiment is included into Flame kit along with Flame test. Subscribe and get everything you need to do this experiment at home.
Problem
Which metal is the best conductor of heat: copper, steel, or brass? Why? After doing some online research, formulate your hypothesis.
Materials
- 3 12-inch long metal rods or thick wire: copper, steel, brass, or other metal. Make sure all the wires are the same gauge, or thickness. Why do you making sure the gauge is the same might be an important step?
- 8 identical Styrofoam cups
- Something to boil water in (a pot or kettle)
- Stove
- 4 instant digital thermometers
- Pitcher or other large container that will fit in the refrigerator
- Water
- Notebook and pen
Step-by-step instructions:
- Fill a pitcher or other large container with water and ice cubes. Allow the water in the pitcher to cool for at least half an hour.
- Bend each metal rod in half two times to make metal bridges. Why do you think we should fold the rod in half twice? Would folding it once produce the same results?

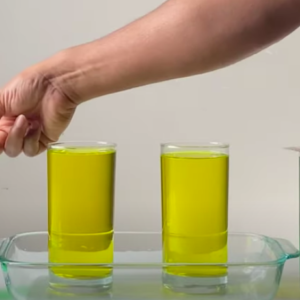
- Place the cups in pairs. Three bridges of the same metal go between each cup. One pair of cups will have no bridges. This is the control group.

- Place the instant digital thermometers in each of the cups that will hold cold water.
- Have an adult boil some water. Let it cool a bit before use.
- For each pair of cups, pour equal volumes for hot water into the “hot” cup. Be sure the water covers the ends of the bridges.
- For each pair of cups, pour equal volumes of cold water into the “cold” cup. Be sure the water covers the end of the bridges. Why do you think the volumes of water need to be equal?
- Take the initial temperature of the cold water. Record the temperature in a chart listing the time (in minutes) and temperature (in degrees Fahrenheit).
- Record the temperature of each cold water cup every 5 minutes for a total of 30 minutes. Your table should have which set it is (none, copper, steel, brass), time, and boxes to fill in for temperature. Do you think that all of the heat that’s conducted away from the hot cup goes into the cold cup? Why or why not? Hint: sometimes heat doesn’t always go where we want it to!
- Which cup of cold water experienced the greatest change in temperature from the beginning to the end? Calculate this by subtracting the cup’s starting temperature from its final temperature.
- Organize your data with line graphs. On the x-axis, plot time in minutes. On the y-axis, plot temperature difference in degrees. By creating a chart like this, we can see which metal transfers the most heat overall. This also gives us some information about each metal’s conductivity: The steeper the slope, the higher the conductivity.
Expected Result:
Copper will transfer the most heat, followed by brass. Steel is the poorest conductor of heat.
Scientific Explanation:
Copper has the highest heat conductivity value, while steel has the lowest heat conductivity value. Heat conductivity is a really important property of a material—we need to keep it in mind when we’re deciding what we’re going to use the material for! Here’s an example: Because copper is such a great conductor, we use it for things like heating rods and wires. Because steel is a poor conductor and can withstand high temperatures, we use it to build engines in airplanes.
Think back to when we folded our wire bridges in half twice. Why do you think we did this? Remember: conduction happens best when more molecules are in contact with each other. Folding the rod in half twice allows the heat from the hot cup to travel through more molecules, allowing more heat to travel from the hot cup to the cold cup. Folding the metal rods only once will still create a good heat bridge, but we would see a smaller temperature change in the cold cups, making it harder to see which metal is the best conductor!
As for the volumes of water needing to be equal? To get good data from our experiment, each hot water cup needs to hold the same amount of heat, and water has a very specific heat capacity. Heat capacity is how much heat energy it takes to change the temperature of a given amount of a substance. Think about it this way: all four of our cups have equal volumes of water at the same temperature, so that means that each hot water cup holds the same amount of heat energy.
So when heat conducts away from the hot cup, does all of that energy go through the metal bridge and into the cold cup? Not at all. Heat is often lost to its surroundings, and in this case, some of the heat from the hot water will be lost to the air. Similarly, the air in the room will lose some of its heat to the cup of cold water. We tried to minimize heat loss by using Styrofoam cups, because Styrofoam is known to be a great insulator—a material that’s a poor conductor of heat.
Further investigation:
Feel free to repeat this experiment with other metals! Metals like silver, gold, and aluminum will give you very different results. Just make sure that you keep all of the other conditions of the experiment the same.
Disclaimer and Safety Precautions
Warning is hereby given that not all Project Ideas are appropriate for all individuals or in all circumstances. Implementation of any Science Project Idea should be undertaken only in appropriate settings and with appropriate parental or other supervision. Reading and following the safety precautions of all materials used in a project is the sole responsibility of each individual. For further information, consult your state’s handbook of Science Safety.
Safety
- Put on protective eyewear. Conduct the experiment on the plastic tray and in a well-ventilated area.
- Keep a bowl of water nearby during the experiment.
- Keep flammable materials and hair away from flame.
- Avoid looking directly at burning magnesium to prevent eye discomfort.
- Do not attempt to extinguish the solid fuel and magnesium — let them burn down completely. Do not touch the stove after the experiment — wait until it cools down.
- Do not allow chemicals to come into contact with the eyes or mouth.
- Keep young children, animals and those not wearing eye protection away from the experimental area.
- Store this experimental set out of reach of children under 12 years of age.
- Clean all equipment after use.
- Make sure that all containers are fully closed and properly stored after use.
- Ensure that all empty containers are disposed of properly.
- Do not use any equipment which has not been supplied with the set or recommended in the instructions for use.
- Do not replace foodstuffs in original container. Dispose of immediately.
- In case of eye contact: Wash out eye with plenty of water, holding eye open if necessary. Seek immediate medical advice.
- If swallowed: Wash out mouth with water, drink some fresh water. Do not induce vomiting. Seek immediate medical advice.
- In case of inhalation: Remove person to fresh air.
- In case of skin contact and burns: Wash affected area with plenty of water for at least 10 minutes.
- In case of doubt, seek medical advice without delay. Take the chemical and its container with you.
- In case of injury always seek medical advice.
- The incorrect use of chemicals can cause injury and damage to health. Only carry out those experiments which are listed in the instructions.
- This experimental set is for use only by children over 12 years.
- Because children’s abilities vary so much, even within age groups, supervising adults should exercise discretion as to which experiments are suitable and safe for them. The instructions should enable supervisors to assess any experiment to establish its suitability for a particular child.
- The supervising adult should discuss the warnings and safety information with the child or children before commencing the experiments. Particular attention should be paid to the safe handling of acids, alkalis and flammable liquids.
- The area surrounding the experiment should be kept clear of any obstructions and away from the storage of food. It should be well lit and ventilated and close to a water supply. A solid table with a heat resistant top should be provided
- Substances in non-reclosable packaging should be used up (completely) during the course of one experiment, i.e. after opening the package.
Disposal
Dispose of the reagents and solid waste together with household garbage.


Reviews
There are no reviews yet.